
Using transformers (to perform NLP tasks) in computer vision
Instead of tokens, subsets of an image (patches) are embedded (linearly embedded into a vector) → add positional embeddings → fed into a transformer
Added a Class token (similar to [CLS] token) = the first token (0) which is meant to represent a representation of the entire image (using image classification)
Biggest difference? Instead of word embeddings, there are patch embeddings
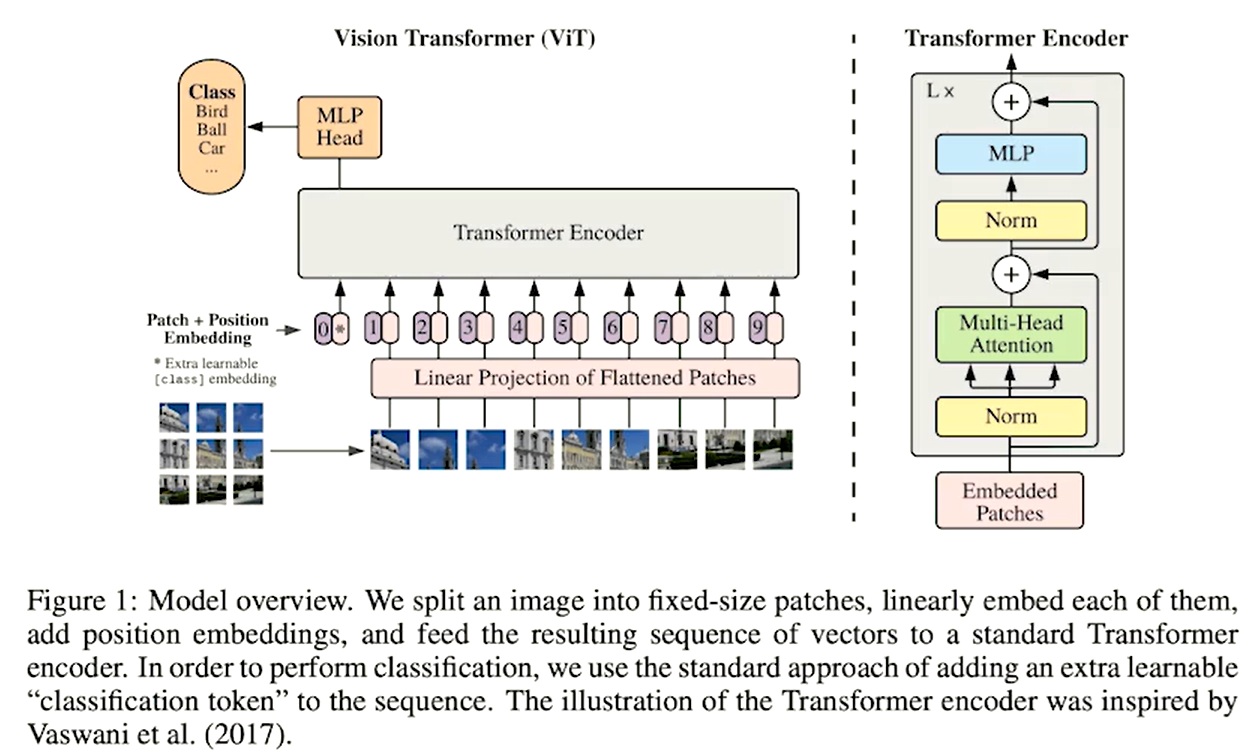
Source: https://arxiv.org/pdf/2010.11929.pdf
Model is pretrained on ImageNet-21k (14 million images sorted into 21843 classes)
- Model called
from transformer import ViTModel
vit_model = ViTModel.from_pretrained('google/vit-base-patch16-224-in21k') #load model
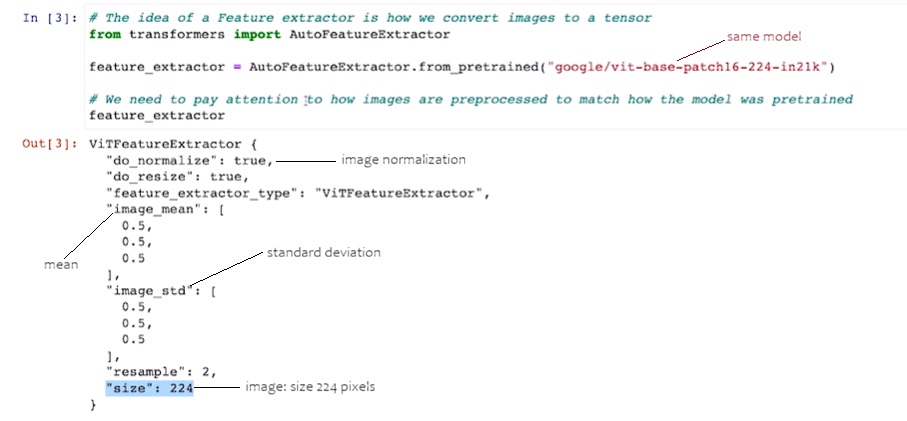
16 by 16 patches, Size 224 by 224 pixels, 21k dataset
- Uses a feature extractor (like a tokenizer in NLP) : take it raw image → convert to a tensor of numbers (called pixel values)
Fine tune - Image captioning with multiple transformers
Using 2 transformers: Images loaded based on ViT model (encoder) → cross attention → DistilGPT2 model (decoder) → images can be captioned
Loading up encoder and decoder models:
model = VisionEncoderDecoderModel.from_encoder_decoder_pretrained('google/vit-base-patch16-224-in21k', 'distilgpt2')
#encoder = vit #decoder = distilGPT2
Since ViT model does not have cross attention, it does have not those weights, which makes the main goal of fine tuning to adjust the weights.
Feature extractor → compose object (take in raw image, resize image to 224 size, convert to a tensor, normalize it to mean and std dev):
compose = transforms.Compose([
        transforms.Resize((224,224)),
        transforms.ToTensor(),
        transforms.Normalize([0.5, 0.5, 0.5], [0.5, 0.5, 0.5])
    ])
Now if we wanted to write a function that allows Gpt2 tokenizes captions:
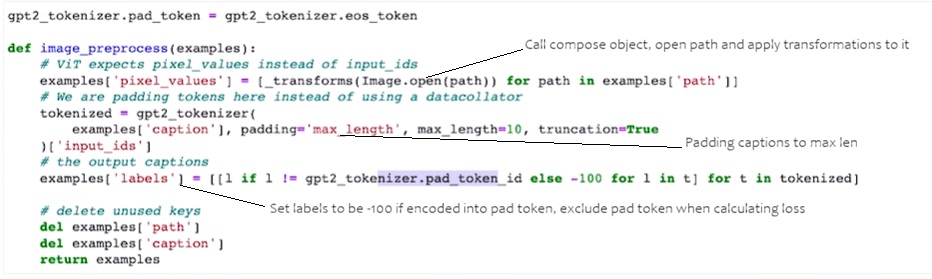
Keep in mind ViT expects image pixels, not token_ids
When you create a custom model and combine transformers, must set the model’s pad token to be same as GPT2’s pad token, same with start token.

Because we’re training it’ll take some time. To make this quicker, we can freeze the last two layers in the Transformer model
# freeze all but the last three layers in the ViT
for name, param in model.encoder.named_parameters():
    if 'encoder.layer.10' in name:
        break
    param.requires_grad = False
Now time to train:
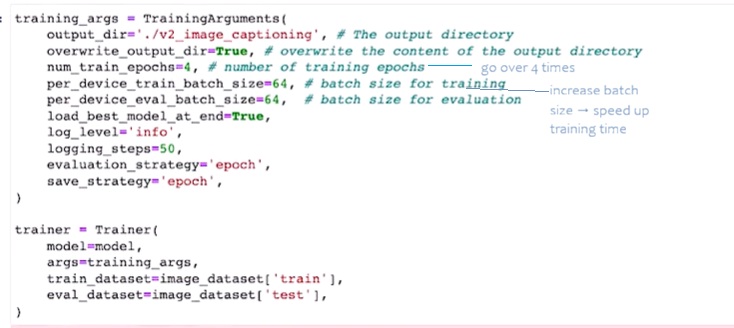
Always run evaluate first to see the loss #loss should decrease the next time
trainer.evaluate()
#loss < 1 indicates the model is predicting correct tokens/pixels accurately
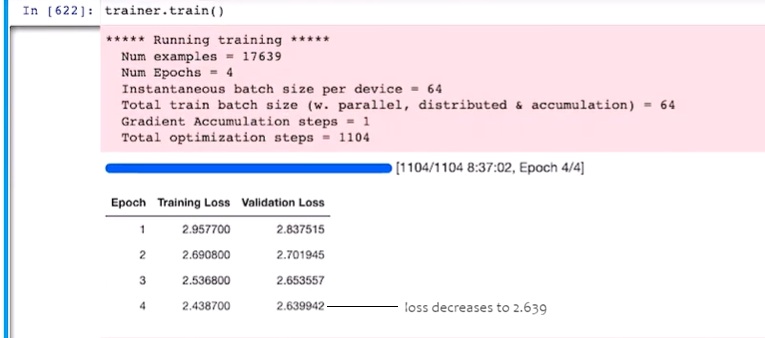
Done training → inference
A singular random photo should not be going to inference, this will add bias. A new composition needs to be made for inference.

Setting number of beams to 3 (higher than 1) = tells model to predict next 3 words
Now let’s say you give it an image and ask it to caption this. It’s doing alright and able to make a caption about a brown dog running in the woods…but for a photo of a women on a cliff doing yoga:
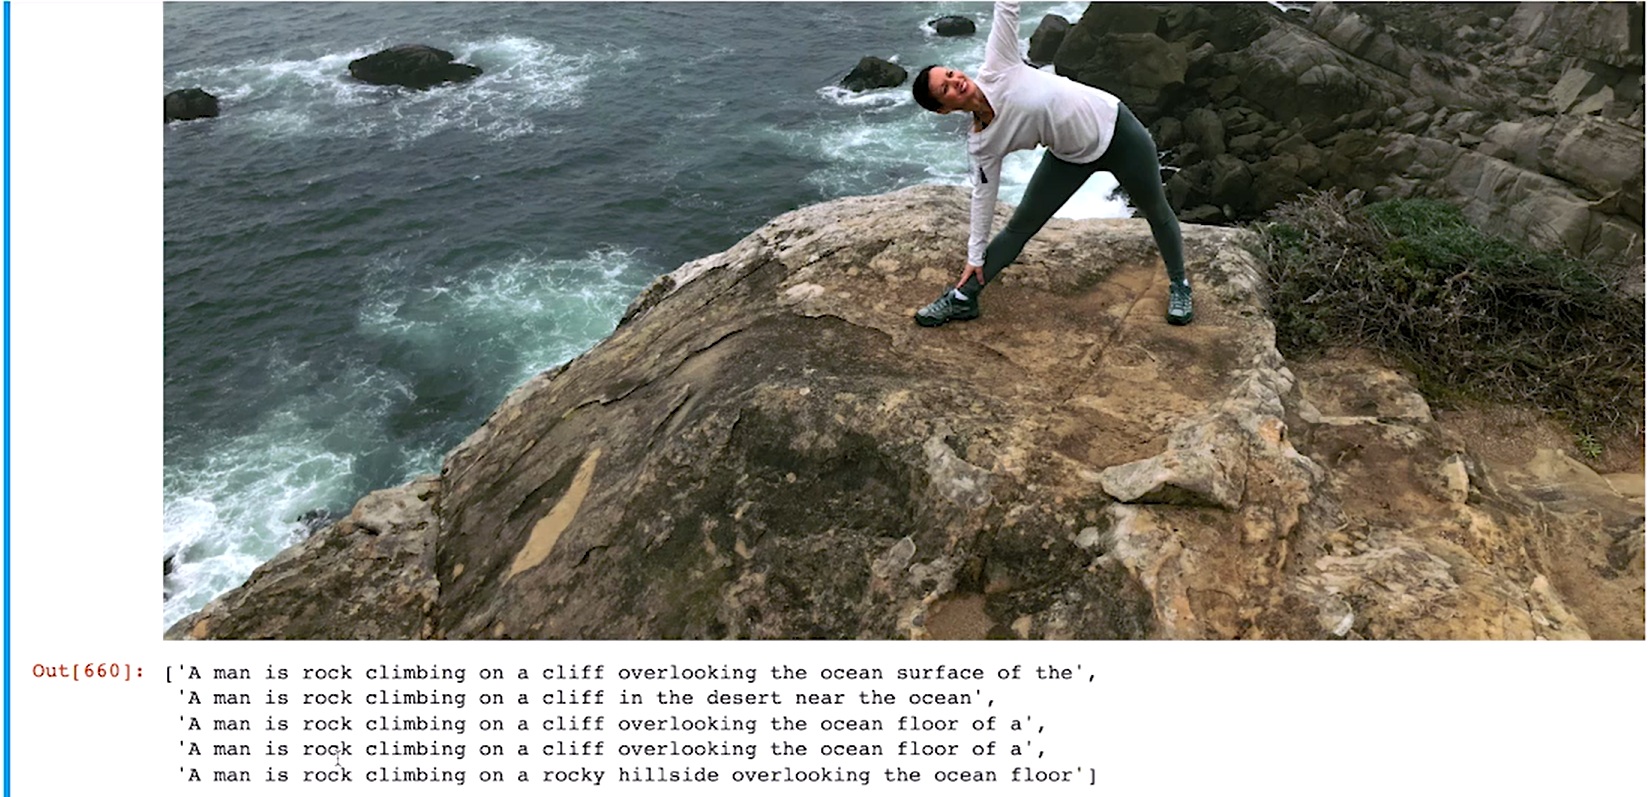
The clear issue is that all 5 sentences say man. This is because the top common words are all about men, dogs, and water.
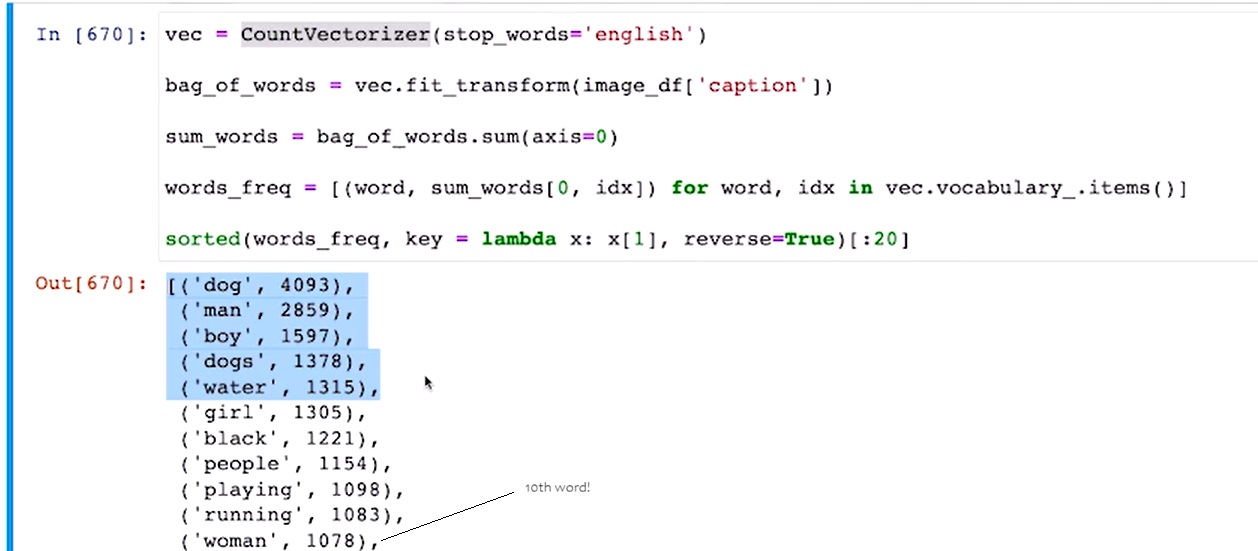
Most of the data it’s seen does not have women, which is why fine-tuning it is important to provide accurate data. Models are efficient, but need to make accurate statements to be useful.
This model needs to be trained more, but once it’s at a low loss function, we can push the model to huggingface.
Pushing to Huggingface
If you want to push a model to huggingface, make sure to push the model and tokenizer. You need a huggingface account and api key (in huggingface settings).
trainer.model.push_to_hub(
 repo_path_or_name=MODEL_IDENTIFIER, use_auth_token=api_key
)
trainer.model.push_to_hub(
 repo_path_or_name=MODEL_IDENTIFIER, use_auth_token=api_key
)
When you push to hub, you’re actually creating a commit on git. On huggingface you can create a README.md.
Now after we use it and train it more. To update it on huggingface:
auto_tokenizer = AutoTokenizer.from_pretrained(MODEL_IDENTIFIER)
auto_model  = AutoModelForSequenceClassification.from_pretrained(MODEL_IDENTIFIER)
#Load up our tokenizer and model
trainer.model.push_to_hub(
 repo_path_or_name=MODEL_IDENTIFIER, use_auth_token=api_key
)
trainer.model.push_to_hub(
 repo_path_or_name=MODEL_IDENTIFIER, use_auth_token=api_key
)
A quicker way…
toxic_clf=pipeline(
 ‘text-classification’, #type of NLP task
 MODEL_IDENTIFIER, #handle of new model
 use_fast=True, #use fast tokenizer
 return_all_scores=True #return probabilities for all classes
)
We’ve seen multiple chatboxes, but transformers architecture can be applied to many use cases. Weights and parameters specific to a model impact the accuracy and loss function. A low loss function indicates the model is ready to be pushed to huggingface. The more we share our models, the more we can learn or be creative when building. This is just the start of the future for transformers.
All code is referenced from Sinan Ozdemir’s Transformer course.
https://github.com/sinanuozdemir/oreilly-transformers-video-series/tree/main/notebooks/deploy